Solar energy is changing the way we power our homes and businesses. Fitting solar panels on your roof or property is not just a trend—it’s a practical step toward saving money and caring for the planet. But for many people, the idea of installing solar panels feels overwhelming.
There are many details, choices, and steps involved. The good news is that with the right guidance, you can understand the process and make smart decisions for your energy needs. This article will walk you through everything you need to know about how to fit solar panels, from planning and design to installation and maintenance.
Whether you want to do it yourself or hire a professional, you’ll learn how to avoid common mistakes, maximize your investment, and ensure your system works smoothly for years to come.
Understanding Solar Panels And How They Work
Before you start, it’s important to know what solar panels are and how they produce electricity. Solar panels, also called photovoltaic (PV) panels, use sunlight to generate direct current (DC) electricity. An inverter changes this DC into alternating current (AC), which powers your home. Solar panels are usually made of silicon cells, which are very efficient at capturing solar energy.
There are different types of solar panels:
- Monocrystalline panels: High efficiency, long lifespan, usually more expensive.
- Polycrystalline panels: Lower cost, slightly less efficient, good for large roofs.
- Thin-film panels: Lightweight, flexible, best for special applications but less efficient.
The energy your panels produce depends on their size, efficiency, and the amount of sunlight your location receives. This means your installation must be planned carefully to get the best results.
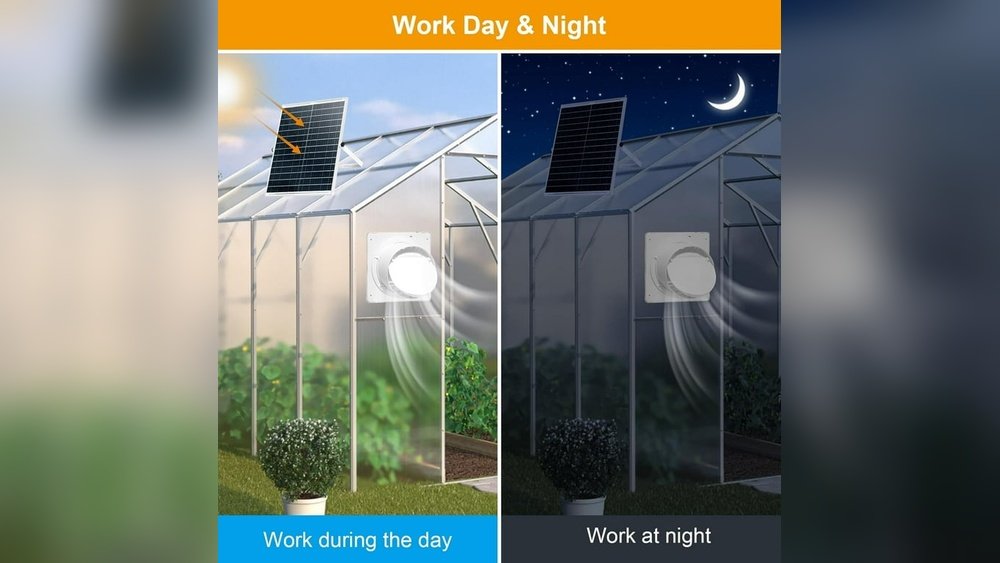
Solar panels work best in direct sunlight, but they can still generate power even on cloudy days. This is because the photovoltaic cells can use diffused sunlight—light that is scattered by clouds and the atmosphere. However, the amount of energy produced will be lower compared to a sunny day.
Some homeowners are surprised to learn that panels can also perform well in cold weather because electronic devices like solar cells are more efficient at lower temperatures.
Another important point is that solar panels not only supply power to your home but can also feed extra electricity back into the grid if your system is on-grid and net metering is available. This can result in credits or even payments from your utility company, depending on local rules.
Assessing Your Property For Solar Panels
Roof Orientation And Tilt
Solar panels produce the most energy when they face the sun directly. In the northern hemisphere, panels should face south. In the southern hemisphere, they should face north. The angle, or tilt, of your panels should match your latitude for the best results. For example, if you live at 35 degrees latitude, your panels should be tilted about 35 degrees.
A flat roof works, but you’ll need racks to tilt the panels. Some roofs are too shaded or have the wrong orientation, which lowers output. If your roof is not suitable, you can consider ground-mounted panels.
In some regions, adjustable mounting systems are used to change the tilt with the seasons. For example, in winter, you might set a steeper tilt to catch the lower sun, and in summer, a flatter angle works better. While these adjustable systems can give a small boost in output, most homeowners use fixed mounts because they are simpler and need less maintenance.
Even small changes in orientation can have a big impact over the years. If your roof faces east or west instead of true south (or north in the southern hemisphere), you might lose about 10–20% of your potential energy output.
Try to get as close to the ideal orientation as possible, but don’t worry if you can’t be perfect—solar panels are flexible and can still work well with some compromise.
Shading Analysis
Shadows from trees, chimneys, or other buildings can reduce your solar energy by 10% to 50%. Even one small shadow can affect the whole panel. Use tools like a solar pathfinder or apps to check for shading at different times of the day and year.
Shading is especially important to consider because most solar panels are wired together. If one panel is shaded, it can reduce the output of the whole row. Some modern systems use microinverters or power optimizers to reduce this problem, but it’s still best to avoid shade as much as you can.
Don’t forget about seasonal changes. Trees may not cast much shade in winter if they lose their leaves, but in spring and summer, they can block a lot of sunlight. Also, new buildings or growing trees can cause more shade in the future.
It’s wise to think ahead and, if possible, trim or remove problem trees before installation.
Roof Condition And Size
Your roof should be strong and in good condition. Solar panels last 25 years or more, so it’s smart to repair or replace your roof before fitting panels. A typical home system needs 15 to 30 square meters of space.
Each panel is about 1. 7 meters by 1 meter.
If your roof is too small or has obstacles (like vents or skylights), you may need fewer panels or a different layout. Always check the weight your roof can hold—a common solar panel setup adds about 15 kg per square meter.
Roofs with tiles, metal, or shingles can all work, but some materials are easier for mounting panels. Asphalt shingles are common and simple to work with, while clay tiles may need special care to avoid cracking. If you have a flat roof, you will need to use heavier mounting systems to hold the panels in place against strong winds.
Older roofs may have hidden damage. Water leaks, soft spots, or rotting wood can all cause trouble after panels are installed. It’s much easier and cheaper to fix the roof first than to remove and re-install the panels later.
Local Climate
The amount of sunlight (solar irradiation) your area gets is key. For example, southern California gets about 5. 5 kWh/m2 per day, while the UK gets about 2. 5 kWh/m2 per day. Use this data to estimate how much energy your system will produce.
Snow, heavy rain, or dust can also affect performance.
If you live somewhere with frequent snow, make sure your panels are installed at a steep enough angle for snow to slide off. In hot climates, panels can get very warm and may produce slightly less energy than on cooler days.
However, since sunlight is stronger, the overall output is usually still high.
Wind is another factor. If you live in an area with strong storms, check that your mounting system is rated for high wind speeds. Some regions have codes requiring extra-strong mounts or special anchoring methods.
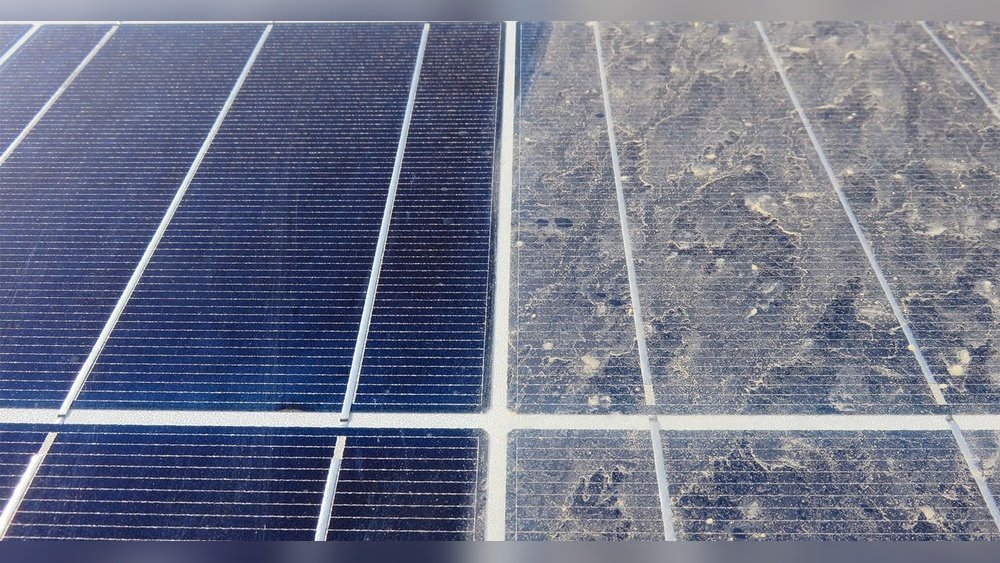
Dust and pollen can also lower panel output. In dry, dusty places, you may need to clean your panels more often. A light rain often helps, but in some climates, regular cleaning is essential to keep your panels working at their best.
Planning Your Solar Panel System
Calculating Energy Needs
Start by looking at your electricity bills. How much energy do you use each month? The average U. S. home uses about 900 kWh per month. Decide if you want to cover all your energy needs or just part of them.
For example, if you use 900 kWh per month and your panels get 4 hours of sun per day:
- 900 kWh / 30 days = 30 kWh per day
- 30 kWh / 4 hours = 7.5 kW system needed
This means you need about 20 to 25 standard panels (each around 350W).
Be aware that your energy use may change over time. If you plan to buy an electric car, add air conditioning, or get new appliances, your future energy needs could go up. It’s smart to build in a little extra capacity if your budget and roof space allow.
Check your bill for “peak” and “off-peak” usage if you have time-of-use rates. Solar panels often save the most money if you use more power during the day when the sun is shining.
System Size And Panel Count
Solar panels come in different sizes, usually from 250W to 400W each. The number you need depends on your energy needs, roof space, and panel wattage.
For example:
| System Size (kW) | Number of 350W Panels | Roof Space Needed (m²) |
|---|---|---|
| 3 | 9 | 15 |
| 5 | 15 | 25 |
| 7 | 20 | 34 |
Try to balance your budget, roof size, and energy needs when planning your system.
Higher-wattage panels can help if you have limited roof space. For example, a 400W panel takes up almost the same space as a 300W panel, but gives you more power. However, higher-wattage panels often cost more per panel, so compare the price per watt.
Don’t forget to allow space for maintenance and airflow. Cramming panels too close together can cause overheating and make cleaning or repairs difficult.
Choosing On-grid Or Off-grid
Most homes use on-grid systems, which connect to the utility grid. You can use solar energy during the day and grid power at night. Some utilities let you send extra energy back to the grid (net metering).
Off-grid systems need batteries to store energy for night use. They are more complex and cost more but are useful for remote locations.
A third option is a hybrid system—on-grid with battery backup. This gives the most flexibility but also costs more.
On-grid systems are usually cheaper and easier to maintain. You don’t need to worry about running out of power on cloudy days, because the grid is always there as backup. Off-grid systems require careful planning—if your batteries run out, you could lose power until the sun comes back.
Hybrid systems are becoming popular as battery prices fall, and they can protect you from blackouts or high evening rates.
Non-obvious insight: Some grid-tied systems are designed to shut down during a power outage for safety, even if it’s sunny. If you want backup power during outages, you need a system with special “islanding” features or batteries.
Inverter Selection
The inverter is a key part of your system. It changes DC power to AC power. There are three main types:
- String inverters: One inverter for all panels. Simple and cost-effective.
- Microinverters: One small inverter per panel. Improves output if panels get shade at different times.
- Power optimizers: Like microinverters, but work with a main inverter. Good for complex roofs.
Microinverters and optimizers cost more, but they increase efficiency if you have shading issues or a complicated roof layout.
A well-chosen inverter also makes future upgrades easier. If you think you might add more panels or batteries later, check that your inverter can support expansion. Some inverters have built-in monitoring, making it easy to track system performance from your phone or computer.
Battery Storage (optional)
Adding batteries lets you store extra energy for night or power outages. Popular options are lithium-ion or lead-acid batteries. Batteries can add $5,000 to $10,000 to your system. If you live where the grid is unreliable, batteries may be a smart investment.
Lithium-ion batteries last longer and need less maintenance than lead-acid batteries. They also take up less space, but they cost more upfront. Some new batteries, like those from Tesla or LG, come with smart controls and can be managed by apps.
If you are interested in going off-grid, you’ll need enough battery capacity for several days of use. This means more cost and more space. For most homes, a small battery backup is enough to keep lights, the fridge, and a few devices running during a blackout.
Non-obvious insight: Some battery systems can also help you save money by storing cheap electricity during the day and using it at night when rates are higher.
Choosing Solar Panels And Equipment
Comparing Solar Panel Brands
There are many brands, but look for panels with:
- High efficiency (18% or more)
- Strong warranties (at least 25 years)
- Good reviews and certifications (like IEC or UL)
Some top brands include SunPower, LG, Canadian Solar, REC, and Trina Solar. Cheaper panels may save money upfront but can lose power faster over time.
It’s also worth checking independent test results or third-party reviews. Some brands are known for better performance in low-light conditions or for being more resistant to harsh weather. Ask your installer if a certain brand is better suited to your climate or roof type.
Quality And Warranty
Panel quality matters more than you think. A low-quality panel may degrade faster, losing up to 1% of power each year, while a good panel loses only 0. 3% per year. This difference adds up over 25 years.
Warranties should cover both product defects and output (performance). Read the fine print—some warranties require regular cleaning or professional checks.
Be sure to register your product after installation, as some manufacturers only honor warranties if you do this. Keep all your purchase and installation documents safe. If something goes wrong, you’ll need these papers to make a claim.
Inverter And Mounting Systems
Don’t overlook the inverter and mounting system. A cheap inverter can fail in 5 years, while good ones last 10 to 15 years. Choose a mounting system made of strong, weather-proof materials like stainless steel or anodized aluminum.
The mounting system must be designed for your local climate. For example, in areas with heavy snow, use mounts with extra support. In hurricane zones, look for wind-rated systems. Good mounting also prevents leaks and keeps your roof warranty valid.
Monitoring Systems
Modern solar systems often include a monitoring system. This lets you see how much energy your panels produce, spot problems quickly, and track your savings. Some systems have apps that send alerts if something is wrong.
Monitoring is not just for tech lovers. It helps you catch problems early. For example, you might notice that one panel is not producing as much as the others—a sign of dirt, shade, or a wiring issue. Fast action can save you money.
Some monitoring systems even track your electricity use, so you can see when you use the most power and adjust your habits to save more.
Additional Equipment
Depending on your setup, you may need:
- DC/AC disconnect switches
- Surge protectors
- Smart meters
- Cabling and connectors
Make sure all parts are compatible and certified for safety.
For larger or more complex systems, you may want a combiner box (to group wires safely) or a backup generator for off-grid homes. Always check that your wiring and connectors are rated for the correct voltage and current.
Credit: www.solartap.com
Permits, Regulations, And Incentives
Building And Electrical Permits
Most places require permits before installing solar panels. These rules protect your safety and make sure the system meets local codes. You’ll need:
- Building permit: Confirms the roof can support the panels.
- Electrical permit: Makes sure wiring is safe.
Permit rules vary. Some cities are strict, while others are easier. Check with your local building office before you start.
The permit process can take a few days to several weeks. Some regions have “fast-track” permits for simple home systems. It’s wise to gather all your documents—system plans, product specs, and installer details—before you apply. Missing paperwork can slow things down.
Utility Approval And Interconnection
If you connect to the grid, your utility company must approve the system. They want to be sure it’s safe and won’t affect the grid. This process is called interconnection.
Common steps include:
- Submitting your plans
- Inspection after installation
- Utility approval before turning on the system
Some utilities require extra paperwork or may limit the size of your system. Check their rules early in your planning. In some cases, utilities may require you to add special safety devices or meters.
Non-obvious insight: If you skip utility approval and connect without permission, you may lose your chance for net metering or even face fines.
Incentives And Rebates
Many governments offer incentives to lower the cost of solar panels. Examples include:
- Federal tax credits (like the U.S. Investment Tax Credit, 30%)
- State or local rebates
- Net metering (selling extra energy to the grid)
Check programs in your area. Some expire or change often, so act quickly to get the best deal. For more details, visit the U.S. Department of Energy’s solar guide.
Some areas also offer property tax exemptions for solar systems, so your property taxes do not go up after you install panels. Others may have low-interest loans or grants for renewable energy projects. Be sure to ask your installer or local government for a full list of options.
Step-by-step Guide: How To Fit Solar Panels
Step 1: Site Assessment And Measurements
Start by measuring your roof and checking for shade. Use a tape measure to mark out where each panel will go. Record the direction and tilt angle. Take clear photos for your installer or permit office.
If you have a complex roof, consider using a drone or professional survey.
A good assessment also includes checking for hazards, like loose tiles, weak rafters, or signs of animal nests. Take note of any areas where you might need extra care during installation.
Step 2: Design The System Layout
Draw a diagram of your roof and plan the layout. Panels should be in straight rows with gaps for airflow (about 10 cm between panels). Leave space for vents, chimneys, or skylights.
If you have a small roof, consider using higher-wattage panels. This lets you generate more energy in less space.
Also, plan where the inverter and any batteries will go—these need to be close to your main electrical panel and away from wet or hot areas. Think about future upgrades; leaving space for an extra panel or two can make expansion easier.
Step 3: Order Equipment
Once your design is ready and approved, order all parts. Double-check that you have:
- The correct number of panels
- Mounting racks and rails
- Inverter(s)
- Cables, connectors, and safety switches
- Monitoring system
- (Optional) Battery bank
Order a few extra mounting brackets and fuses, just in case.
Check shipping times. Some special parts may take weeks to arrive. If you are in a region with frequent storms or supply shortages, order early to avoid delays.
Step 4: Prepare The Roof
Clean the roof and check for damage. Repair any weak spots. Mark where the mounting brackets will go. Brackets should be attached to the roof rafters (not just the surface) for strength.
Use a stud finder or tap gently to find rafters. Space brackets about 1. 2 to 1. 5 meters apart.
For tile roofs, you may need to remove and cut some tiles to fit the brackets. Always seal holes with roofing sealant or flashing to prevent water leaks. It’s easier to do this work carefully before the panels are installed.
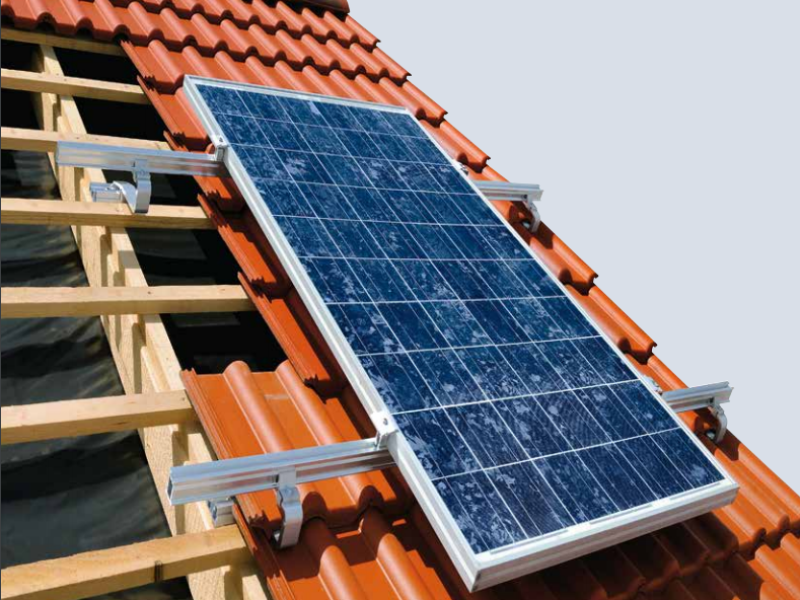
Step 5: Install Mounting System
Attach the mounting brackets using stainless steel lag bolts. Seal all holes with roofing sealant to prevent leaks. Install the rails or racks on top of the brackets. Make sure they are straight and level.
The rails must be parallel, or the panels won’t fit. Use a spirit level and measuring tape.
Check that all bolts are tight but do not overtighten, which can damage the roof structure. If you have a flat roof, use ballasted mounts—these are weighted down with concrete blocks instead of being bolted in.
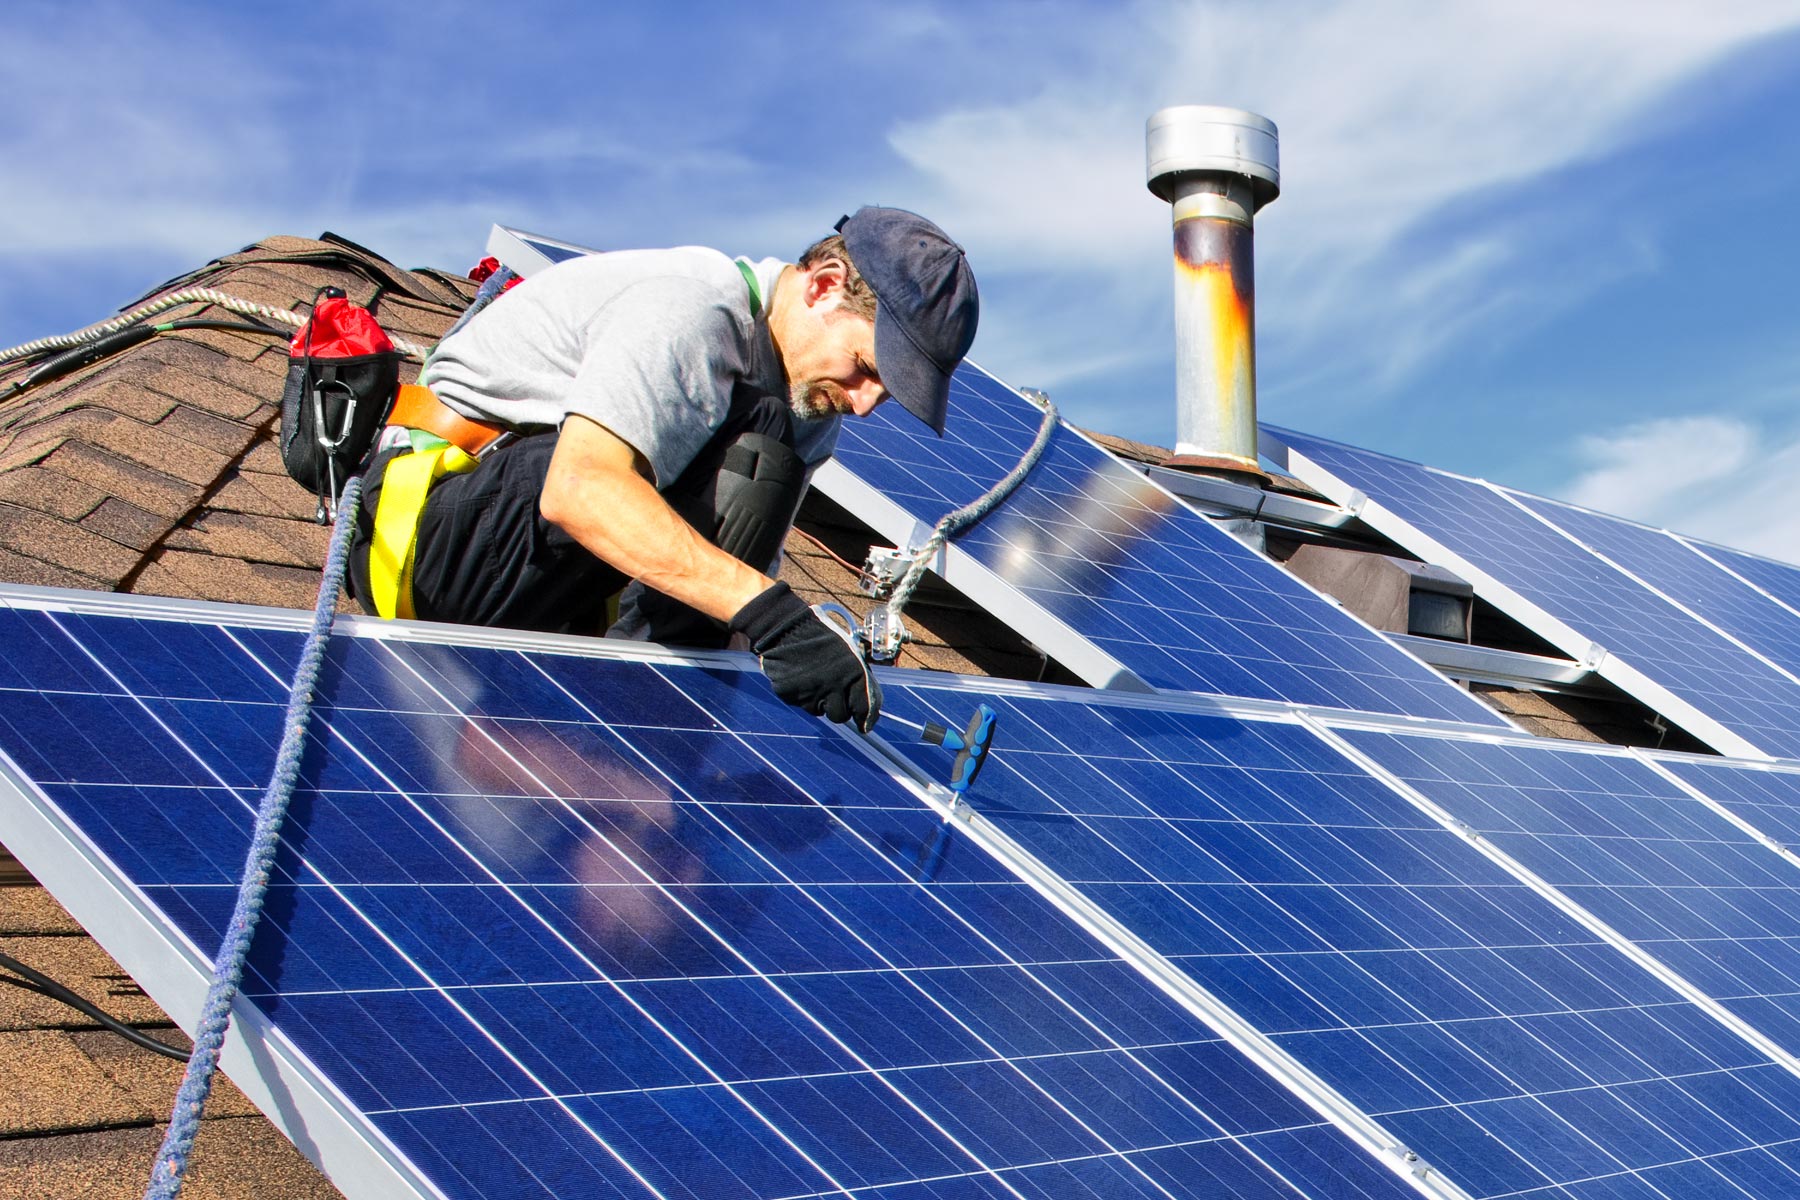
Step 6: Attach Solar Panels
Lift panels onto the roof one at a time. Secure each panel to the rails with clamps or bolts. Panels should be tight but not over-tightened (this can crack the glass).
Connect the panel cables together in series or parallel, depending on your system design. Use waterproof connectors.
Always follow the manufacturer’s wiring diagram. If you have microinverters, connect each panel to its own inverter before linking to the rest of the system. Double-check all connections for correct polarity.
Step 7: Wiring And Inverter Connection
Run cables from the panels to the inverter location. Cables should be in conduit to protect them from weather and animals. Label each cable.
Mount the inverter in a cool, dry place—like a garage wall. Connect the DC cables from the panels to the inverter. Then connect the inverter to your home’s electrical panel (AC side).
If you have batteries, connect them according to the manufacturer’s instructions.
For safety, use wire sizes rated for your system’s current. Too-small wires can overheat and cause fire hazards. All wiring should be neat and supported—never hanging loose or running over sharp edges.
Step 8: Grounding And Safety Checks
Ground all metal parts (rails, frames) to prevent electric shock. Check that all connections are tight and wires are neat.
Install disconnect switches near the inverter and the main panel. These let you turn off the system for maintenance or emergencies.
Check all fuses and breakers. Test the system with a multimeter before turning on the inverter. Look for any signs of loose wires or short circuits.
Step 9: Inspection And Utility Approval
Call your city or county inspector to check the system. They will look for:
- Strong mounting
- Safe wiring
- Correct labeling
Once you pass, your utility company will inspect and give approval. They may install a new meter for net metering.
Keep all your inspection reports and utility approvals. You may need them for incentives or future upgrades.
Step 10: Power Up And Monitor
After approval, turn on the inverter and check your monitoring system. Watch the output for a few days to be sure everything works. If you see low output or errors, check for loose wires or shade problems.
Monitor your system regularly. If you notice sudden changes in output, it may be due to dirty panels, wiring issues, or new shade from growing trees or nearby construction.
Common Mistakes To Avoid
- Ignoring roof condition: Panels last 25 years, so don’t install on a weak or old roof.
- Overestimating energy production: Use real sunlight data, not just panel ratings.
- Bad orientation or tilt: Panels not facing the right way will underperform.
- Poor shading analysis: Even small shadows reduce output greatly.
- Cheap inverters: These often fail early and cost more in the long run.
- Skipping permits: You may face fines or be forced to remove the system.
- Not checking compatibility: All parts must be rated for your system voltage and type.
- Ignoring local regulations: Some areas have special rules for historic buildings or HOA restrictions.
- DIY mistakes: If you’re not confident with electrical work, hire a pro.
- No monitoring system: Without it, you won’t spot problems early.
An extra mistake people make is not keeping records of maintenance and warranty information. If a panel or inverter fails, you may need proof of proper care to get a replacement.
Professional Vs. Diy Installation
When To Hire A Professional
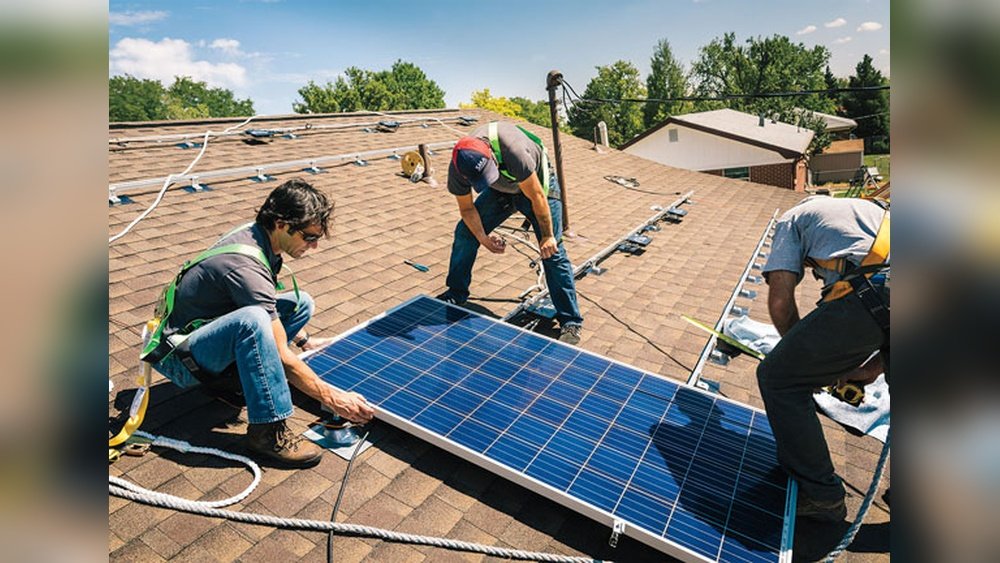
If your roof is steep, tall, or complex, or you’re unsure about electricity, hire a certified solar installer. They know local rules and can get permits faster. A pro can finish most jobs in 2 to 3 days.
Professionals also have the right safety equipment and insurance. If something goes wrong, you are not at risk for damages or injuries. Some installers offer maintenance packages or performance guarantees for extra peace of mind.
Diy Pros And Cons
DIY can save $2,000 to $5,000, but you must be comfortable with tools, ladders, and wiring. You’ll still need permits and inspections. Some warranties are only valid if installed by a pro.
Non-obvious insight: Some utilities require proof of professional installation before allowing grid connection or net metering.
DIY is rewarding but comes with risk. Mistakes can cost you more in repairs or lost energy savings than you save upfront. If you decide to DIY, consider hiring a licensed electrician for the final wiring.
Cost Comparison
Here is a typical cost comparison:
| System Size (kW) | DIY Cost (USD) | Professional Install (USD) | Typical Payback (Years) |
|---|---|---|---|
| 3 | 5,000 – 6,000 | 7,000 – 9,000 | 7 – 10 |
| 5 | 8,000 – 10,000 | 12,000 – 15,000 | 6 – 9 |
| 7 | 11,000 – 14,000 | 17,000 – 20,000 | 5 – 8 |
DIY is best for those with good skills, a simple roof, and no special rules.
Non-obvious insight: Remember to include the value of your time and any special tools or equipment you’ll need. Sometimes, these hidden costs make professional installation a better deal in the long run.
Maintenance And Troubleshooting
Cleaning
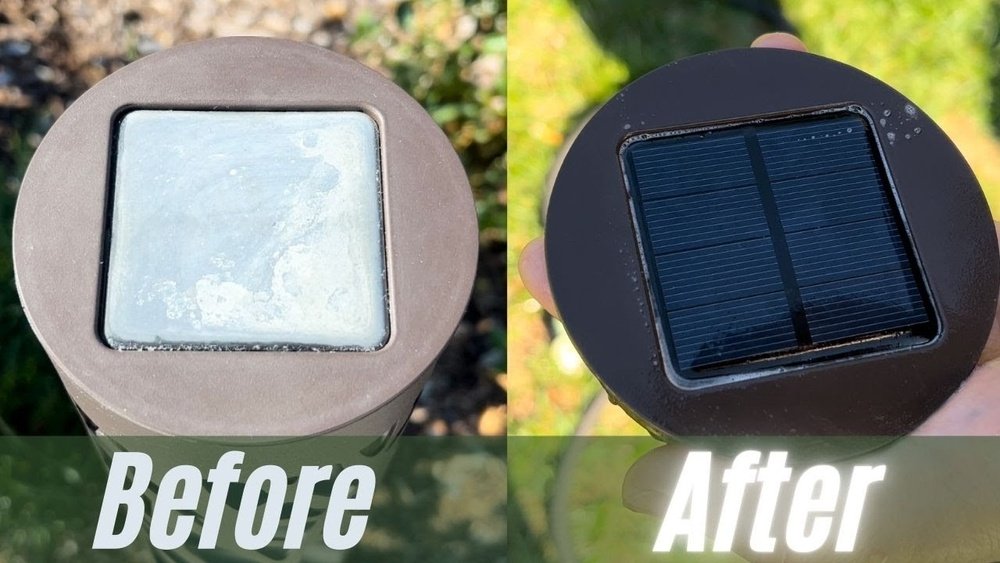
Dust, leaves, and bird droppings can cut output by 5% to 20%. Clean panels with water and a soft brush every few months. Avoid harsh chemicals. In snowy areas, brush off snow gently.
If your panels are hard to reach, use a long-handled brush or hire a cleaning service. Clean early in the morning or late in the day to avoid hot glass, which can crack if water hits it suddenly.
Inspections
Check the system every 6 months for:
- Loose wires
- Cracked panels
- Broken mounts
- Inverter error lights
Fix problems quickly to avoid bigger damage.
Look for signs of animals nesting under panels, especially birds or squirrels. They can chew wires or cause damage. Special mesh guards are available to keep pests away.
Monitoring Performance
Use your monitoring app or system to track daily output. If you see a sudden drop, check for new shade (like a growing tree) or dirty panels.
Compare your actual output to the expected numbers for your system and location. Small drops are normal over time, but big changes mean something needs attention.
Repair And Replacement
Panels rarely fail, but inverters and batteries may need replacement every 10 years. Keep records of all parts and warranties.
Non-obvious insight: Many solar panel warranties require you to register your product online and may ask for regular proof of cleaning or inspection. Missing these steps can void your warranty.
If a panel or inverter fails, contact the manufacturer first. They may send a replacement part or recommend a local repair service. Never work on the electrical parts if you are not trained—call a professional for any major repairs.
Upgrades And Future-proofing
Adding More Panels
Plan your mounting system with room for extra panels. This is called future-proofing. You may want to add panels later as your energy needs grow or as prices drop.
Run extra conduit or leave extra roof space during your first install. It’s much easier to add panels if the groundwork is already in place.
Adding Batteries
Choose an inverter that can connect to batteries, even if you don’t add them now. This way, you can upgrade to battery storage in the future without changing everything.
Some inverters are “battery-ready” and just need a simple add-on kit to connect batteries later. Ask your installer or supplier about upgrade paths.
Integration With Smart Home
Some solar systems work with smart home devices. For example, you can control when to charge your electric car or run appliances when the sun is shining.
Smart thermostats, water heaters, and home energy management systems can all be linked to your solar system for maximum savings.
Ev Charging
If you own or plan to buy an electric vehicle, consider adding an EV charger powered by your solar system.
Some EV chargers can be programmed to use only solar power, or to charge when your panels are producing the most energy.
Non-obvious insight: Planning ahead for upgrades can save you thousands in future labor and hardware costs.
Credit: nakedsolar.co.uk
Solar Panel Safety Tips
- Turn off power before working on the system.
- Use safety gear: Gloves, harness, and non-slip shoes.
- Never step on panels—they can crack.
- Avoid wet or windy days for roof work.
- Mark all breakers and switches clearly.
- Keep kids and pets away during installation.
- Follow all manufacturer instructions.
- Check for fire hazards: Keep wiring neat and away from leaves or debris.
- Don’t overload circuits.
- Call an electrician if you’re unsure.
Never rush safety steps. Most accidents happen when people skip basic checks or try to finish too quickly.
Real-world Example: Solar Panel Installation Case Study
Let’s look at a real-life example.
Location: Suburban home in Texas
Roof: South-facing, 35° tilt, 40 m² usable area
Energy use: 900 kWh/month
System size: 7 kW (20 panels, 350W each)
Inverter: String inverter
Battery: None (on-grid)
Install time: 3 days
Total cost: $14,500 (before incentives)
Annual savings: $1,400 on energy bills
Payback time: 7 years
Extra insight: The homeowner chose higher-wattage panels to fit more power in a small space. They used a monitoring system to find and fix a loose wire early on, preventing loss of savings.
Another detail: The installer checked for tree growth around the property and suggested trimming one tree to avoid future shading. This small step improved long-term system output by about 8%.
The owner also added extra conduit during installation, which made it easy to add two more panels a year later when they bought an electric car.
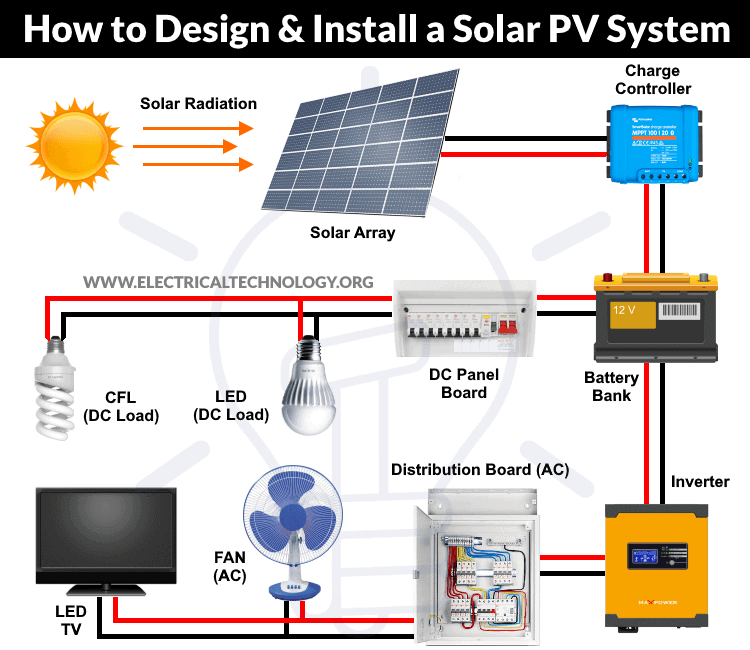
Credit: www.electricaltechnology.org
Environmental And Financial Benefits
Solar panels reduce your carbon footprint—a 5 kW system saves about 4 tons of CO2 per year. Over 25 years, this equals planting about 100 trees.
Financially, solar panels increase home value by about 4% on average. They protect you from rising electricity prices and can even earn you money if your utility pays for extra energy.
Non-obvious insight: Some home insurance policies offer discounts for solar panel owners because homes with solar are often better maintained and more valuable.
Solar energy also reduces your dependence on fossil fuels and helps your community avoid power shortages during peak demand. In some areas, solar homes are given priority for grid repairs after storms because they help support the grid.
Frequently Asked Questions
How Long Do Solar Panels Last?
Most solar panels last 25 to 30 years. After this, they may still work but produce less energy. Inverters usually need replacement after 10 to 15 years.
Can I Install Solar Panels Myself?
Yes, if you have good skills and follow safety rules. But professional installation is safer and may be required for warranties, permits, or incentives.
Will Solar Panels Work On Cloudy Days?
Yes, but they produce less energy. Panels still generate power from indirect sunlight. Output can drop by 10% to 30% on cloudy days.
How Much Maintenance Do Solar Panels Need?
Very little. Clean them a few times a year and check for damage or dirt. Most problems are easy to spot with a monitoring system.
Are There Any Risks With Solar Panels?
Solar panels are safe if installed correctly. Risks include electric shock, roof leaks, or fire from poor wiring. Always follow safety rules and get inspections.
Extra tip: If you move, solar panels can be transferred to your new home, but this can be costly. Often, it’s better to leave them as a value boost for the next owner.
Fitting solar panels is a smart investment in your future. With careful planning, good equipment, and proper installation, you’ll enjoy clean energy and lower bills for years to come. Take your time, ask questions, and don’t rush—your solar journey starts with the right first step.