Are you wondering how many watts your solar panel needs to power your Starlink internet? Finding the right size can feel confusing, but it’s simpler than you think.
Getting this right means you’ll enjoy fast, reliable internet without worrying about running out of power. You’ll discover exactly how to choose the perfect solar panel wattage for your Starlink setup—so you stay connected no matter where you are. Keep reading to make sure your Starlink never goes dark.
Starlink Power Needs
Starlink is a popular satellite internet service that needs a steady power supply. Knowing its power needs helps in choosing the right solar panel. This ensures the device runs smoothly without interruptions. Understanding power use guides you to pick a solar setup that matches Starlink’s demands.
Average Wattage Consumption
Starlink typically uses about 50 to 75 watts during normal operation. This level keeps the connection stable for daily internet use. The power draw can vary slightly based on the model and network activity. Planning solar power should consider this average consumption to maintain consistent service.
Peak Power Requirements
At startup or heavy use, Starlink may require up to 100 watts briefly. This peak power supports initial connection and data bursts. Solar panels and batteries must handle these spikes to prevent power drops. Knowing peak needs helps avoid outages during critical moments.
Credit: sunslice-solar.com
Solar Panel Basics
Understanding solar panel basics helps pick the right power for Starlink. Solar panels turn sunlight into electricity. The right wattage ensures your Starlink device runs smoothly. Knowing panel types also boosts efficiency and saves space.
Wattage Ratings Explained
Wattage shows how much power a solar panel produces. Higher watts mean more electricity from sunlight. Panels usually range from 50 to 400 watts. For Starlink, choose a panel with enough wattage to match its power needs. Check Starlink’s power use before buying.
Panel Types For Efficiency
Solar panels come in three main types: monocrystalline, polycrystalline, and thin-film. Monocrystalline panels are most efficient and last longer. Polycrystalline panels cost less but have lower efficiency. Thin-film panels are lightweight and flexible but produce less power. Pick the type that fits your space and budget.
Calculating Solar Panel Size
Calculating the right solar panel size for Starlink ensures steady internet power. It depends on your daily energy needs, sunlight availability, and battery setup. These factors help pick the right wattage for your solar panel system.
Daily Energy Usage
Start by finding Starlink’s daily power use in watt-hours. Starlink typically uses around 60 watts while running. Multiply this by the hours you expect to use it each day. For example, 60 watts times 8 hours equals 480 watt-hours per day. This number shows how much energy your solar panel must generate daily.
Sunlight Hours Impact
Solar panels only work when the sun shines. Check average sunlight hours in your location. For instance, 5 peak sun hours means your panel produces full power for 5 hours daily. Divide your daily energy use by sunlight hours to find needed panel wattage. Using 480 watt-hours divided by 5 hours equals 96 watts. This helps select a panel that meets your energy needs.
Battery Storage Considerations
Batteries store energy for use when the sun is down. Choose battery size to cover Starlink’s power needs overnight or during cloudy days. A good battery should hold at least one day of energy use, about 480 watt-hours in this case. This backup keeps your internet running smoothly. Batteries also affect how big your solar panel must be to recharge properly.

Credit: www.reddit.com
Recommended Solar Panel Options
Choosing the right solar panel for Starlink depends on your setup and power needs. The goal is to keep your Starlink device running smoothly without interruption. Solar panels come in various types, each suited for different uses. Some are easy to move, while others stay fixed in one place. Hybrid systems combine both for flexibility and reliability. Below are the recommended solar panel options to power your Starlink efficiently.
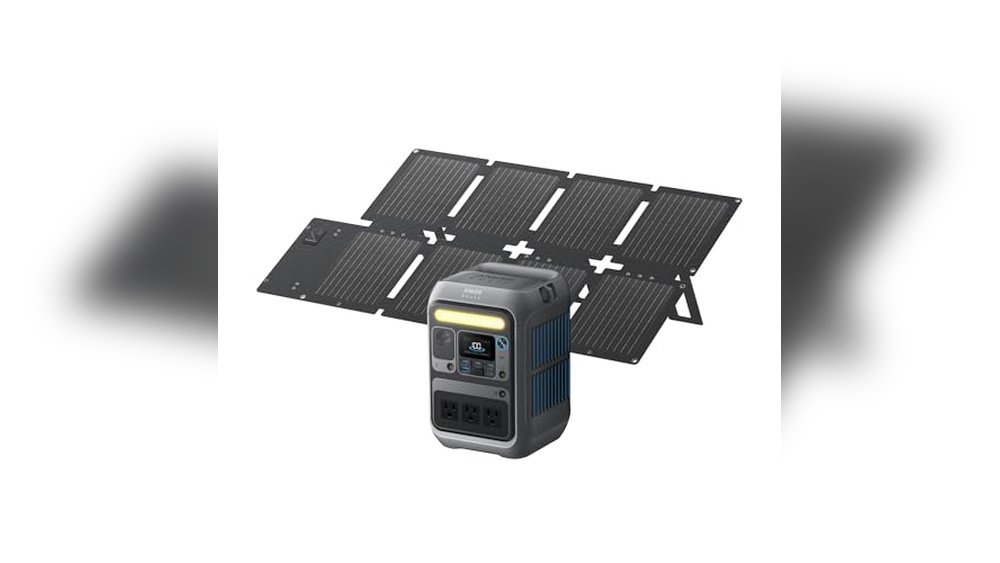
Portable Panels For Starlink
Portable solar panels offer easy setup and mobility. They are light and compact, perfect for camping or travel. These panels usually range from 50 to 150 watts. They can charge batteries or power Starlink directly. Portable panels work well with a small battery bank. Ideal for those who need internet on the go.
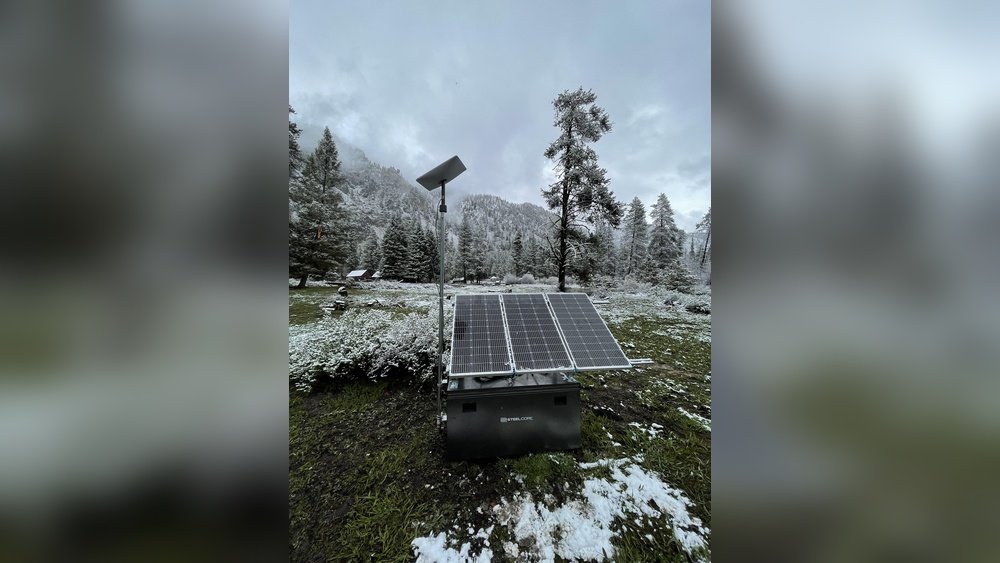
Fixed Installations
Fixed solar panels mount permanently on rooftops or poles. They provide steady power without moving parts. These panels generally range from 200 to 400 watts or more. Fixed systems offer higher efficiency and long-term use. They connect to larger battery banks or inverters. Best for homes or cabins with stable Starlink setups.
Hybrid Systems
Hybrid solar systems combine portable and fixed panels. This setup offers power reliability and flexibility. Use fixed panels for daily power and portable ones as backup. Hybrid systems handle varying sunlight and power demands well. They provide continuous power to Starlink even in cloudy weather. Perfect for users who want the best of both worlds.
Power Management Tips
Managing power for your Starlink system is key to steady internet access. Efficient power use means your solar panel setup lasts longer and works better. Small changes can save energy and keep your connection strong. Focus on smart ways to reduce power needs and improve usage.
Optimizing Starlink Usage
Turn off Starlink when not needed. Avoid running it all day if no one uses the internet. Use Starlink during peak hours only. Check for firmware updates to improve energy efficiency. Place the dish where it has the best signal to reduce power use.
Energy-saving Accessories
Use low-power routers that match Starlink’s output. Choose LED lights over older bulbs to cut energy use. Add a smart power strip to turn off devices fully. Consider battery backups to store solar energy for cloudy days. These tools help stretch your solar power further.

Credit: www.reddit.com
Installation And Setup
Installing and setting up a solar panel system for your Starlink requires clear steps. Proper installation ensures the system works efficiently and lasts longer. It involves mounting the panels, wiring them correctly, and following safety rules. Each step needs careful attention to avoid problems later.
Mounting Solar Panels
Choose a location with full sunlight. Roofs or open yards work best. Fix the panels firmly using brackets or racks. Make sure the angle captures maximum sun. Secure mounts prevent damage in strong winds. Check for shadows from trees or buildings. Avoid shaded spots to keep power steady.
Wiring And Connections
Use wires rated for outdoor use and weather resistance. Connect the solar panels to a charge controller first. The charge controller protects the Starlink battery from overcharging. From there, connect to the battery and inverter if used. Tighten all connections to avoid power loss. Label wires to keep track and simplify maintenance.
Safety Precautions
Turn off all power sources before starting work. Wear gloves and safety glasses during installation. Avoid working on wet or windy days for safety. Use insulated tools to prevent electric shocks. Double-check all connections before powering the system. Keep the setup area clear of debris and pets. Follow local electrical codes to ensure safety.
Troubleshooting Power Issues
Troubleshooting power issues with your solar panel for Starlink is important. Power problems can cause connection drops or slow speeds. Fixing these issues helps keep your internet stable and strong.
Understanding common problems and tracking solar output makes it easier to solve power faults. This section explains key points to check and how to monitor your solar system’s performance.
Common Power Problems
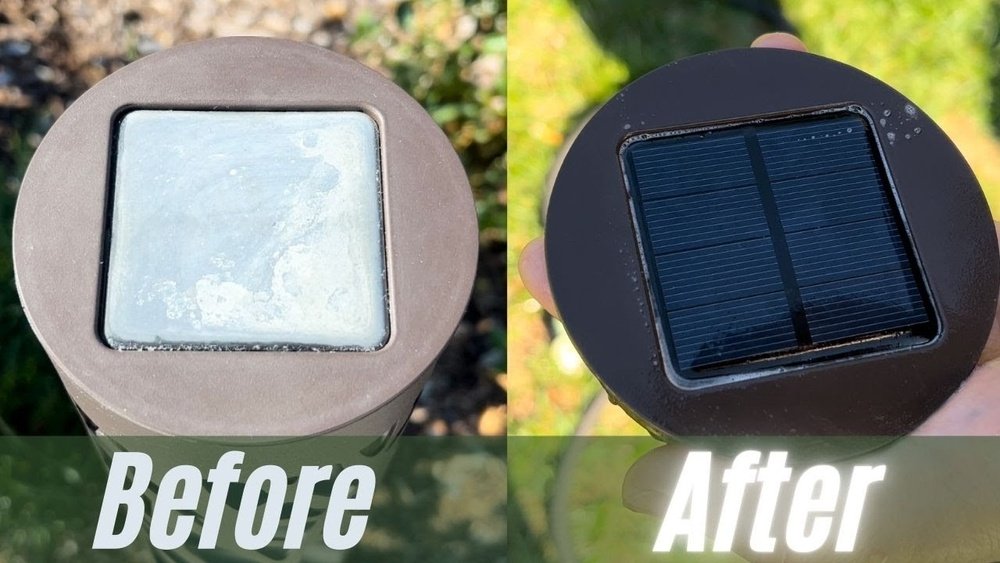
Solar panels might not produce enough power due to dirt or shade. Clouds and bad weather reduce sunlight and lower energy output. Loose wires or bad connections can stop power flow to Starlink.
Battery issues also cause power problems. Old or damaged batteries lose charge quickly. Overloading the system with too many devices can drain power fast.
Check all cables and connections for damage or looseness. Clean panels regularly to remove dust and debris. Avoid placing panels in shaded areas for better sunlight capture.
Monitoring Solar Output
Use a solar charge controller or monitor device to track output. These tools show real-time data on power production and battery status. Watching this information helps spot drops in energy early.
Set alerts for low battery or low solar input. This way, you know when to act before Starlink loses power. Regular checks ensure your system runs smoothly and delivers steady internet.
Cost And Investment
Investing in solar panels for Starlink requires understanding the costs involved. The price depends on the wattage and quality of the solar panel system. You also need to include extra equipment like batteries and controllers. These add to the total investment but ensure a stable power supply.
Planning your budget carefully helps avoid surprises. Knowing the upfront cost and ongoing expenses is key. Solar panels can save money over time by reducing electricity bills. This makes the initial investment worthwhile for many users.
Budgeting For Solar Power
Start by calculating the wattage needed for Starlink. A typical Starlink system uses about 100 watts. Add extra wattage to cover other devices or cloudy days. Compare prices from different brands and sellers. Include costs for installation and wiring. Check for any local incentives or rebates. These can lower the overall expense.
Set aside money for maintenance and possible repairs. Solar panels usually last 20 to 25 years. Batteries may need replacement every 5 to 10 years. Knowing these costs helps you plan better.
Return On Investment
Solar power reduces your electricity bill monthly. This creates savings that add up over time. Calculate how long it takes to recover the initial cost. This period is called the payback time.
Short payback times mean better investment value. For Starlink users, solar panels can pay off in 3 to 7 years. After that, power is basically free. This makes solar power a smart choice for remote areas.
Solar panels also increase property value. Homes with solar systems attract buyers more easily. This is an extra benefit of investing in solar power.
Frequently Asked Questions
How Many Watts Does A Starlink Dish Consume?
A Starlink dish typically consumes about 100 watts during operation. This power need varies slightly based on model and usage. Knowing this helps determine the solar panel size for efficient, uninterrupted internet service.
What Size Solar Panel Supports Starlink Power Needs?
A 200-watt solar panel is usually sufficient to power Starlink reliably. This capacity accounts for energy losses and ensures consistent performance, even with variable sunlight conditions, keeping your internet connection stable.
Can A 100-watt Solar Panel Run Starlink?
A 100-watt solar panel may power Starlink briefly but is often insufficient. It might not provide continuous power during low sunlight, risking interruptions. Opting for higher wattage panels ensures steady energy supply and better performance.
Is A Battery Needed With Solar For Starlink?
Yes, a battery is essential to store solar energy and power Starlink at night or cloudy days. It ensures the internet stays online continuously by bridging power gaps when solar input is low.
Conclusion
Choosing the right solar panel wattage helps keep Starlink running smoothly. A panel that matches your power needs avoids outages and saves money. Think about your location, sunlight hours, and Starlink’s power use. A 100 to 200-watt panel often works well for most users.
This size offers a good balance between energy and cost. Installing a proper solar setup means reliable internet in remote places. Simple planning leads to better performance and less hassle. Solar power is a smart way to support your Starlink connection.